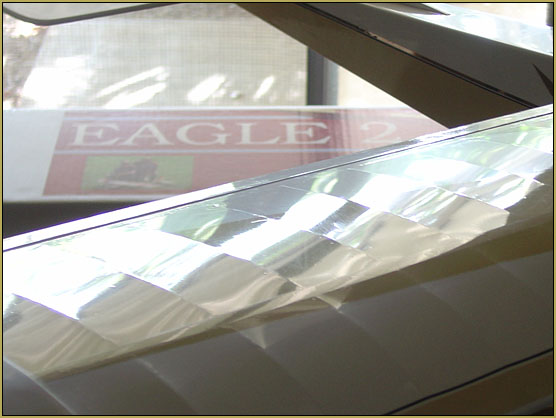
This article was written while I was using Econokote… I have discovered a NEW glass cleaner for use with MonoKote!
See the UPDATE, at the bottom of this story!
It’s the Ammonia!
Monokote-on-Monokote Windex-Method Success!
FIRST: A Disclaimer!
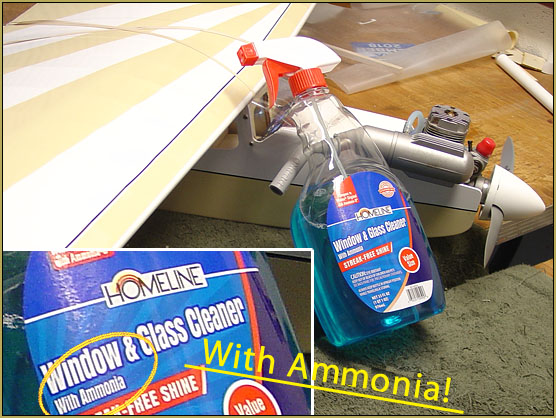
My covering job used Jet White Monokote and Cream Econokote. Econokote was used as the trim color and it worked GREAT with that inexpensive WalMart-brand glass cleaner. I DO NOT KNOW, for certain, if this method works if both materials are standard Monokote. Econokote is a lower-temperature, thinner covering… thinner than Monokote… and is intended for use as a trim-color and for covering foam, and such. I saw in the forums a discussion of “which Windex to use”… but, like I said, I happened to have that cheap glass-cleaner “with Ammonia!” on hand… so that’s what I used.
All that said, I had great success!
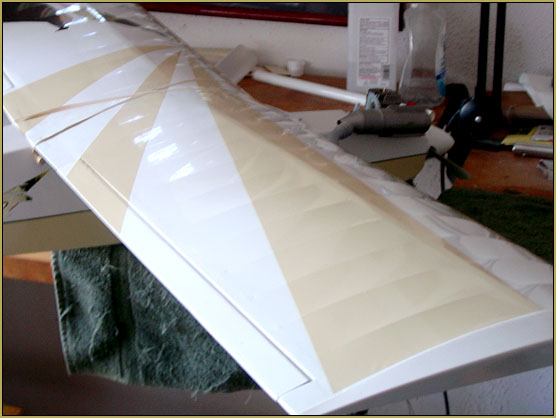
I wanted to apply huge graphics to the wing of the Eagle II kit I am building. First, I covered the fuselage in Jet White Monokote and then trimmed it with the Cream Econokote… all using my Hobbico “Custom Sealing Iron” and “Deluxe Heat Gun”… and I had the usual fight with the trapped air-bubbles, wrinkles, and those temp-too-high pop-up gas bubbles. I was unable to reduce the iron temperature so low as to not-bubble and yet still adhere that Econokote.
The job came out “OK”… as I saw online: “Good enough for a Sport model.”
As I approached the wing, I was terrified!
I did not take a photo of the process, but it is simple to describe:
Cut your trim-piece to size, peel-off the backing film: ready to apply. Spritz the area to be covered with Windex. Spritz the trim piece on the adhesive side… get it wet! Apply the trim piece to the model and slide it around a little to be sure ALL of the adhesive is wet. Finalize the position of the piece. Squeegee the piece onto the model using a plastic card/credit card… I used my old Hasting’s Membership Card! (Keep a hand-towel handy so you can mop-up the extra Windex as you go.) Start at one end of the graphic or start in the center and work your way to the edges. You are trying to push ALL of the Windex out from under your trim piece… the Ammonia softens the Monokote adhesive and is less aggressive than any solvent… no worries about bleeding the color of your trim piece.
I was amazed how easy and fast this can happen!… I put the piece on… squeegeed-out all the bubbles and wrinkles, and waited for it to dry.
Covering the compound-curves of the already-Monokote-covered-wing turned out to be no problem. Treat each “bay” between ribs as a special case… paying attention to those curves and rib profiles. My woodwork was not fantastic and that Epoxy-saturated nylon reinforcement strip down the center-joint of the wing was very much 3-dimensional and required extra attention. As if you were chasing wrinkles and grooves with your heat-iron, use that plastic card to stick the film into place on the rough-spots.
Part of my design had the trim-film crossing the wing and onto an aileron. I flexed the aileron down so as to open the gap to be bridged… and I applied and squeegeed the film… getting a hard edge at both edges of the bridged-gap.
If you are successful in getting “all” of the Windex squeegeed-out, the film seems to dry quickly! I saw in an RC Group write-up that you want to wait “overnight” for it to dry… but I found that it needed maybe less than an hour before it seemed to be stuck-down really well!
HEAT… and the Trim Sealing Tool…
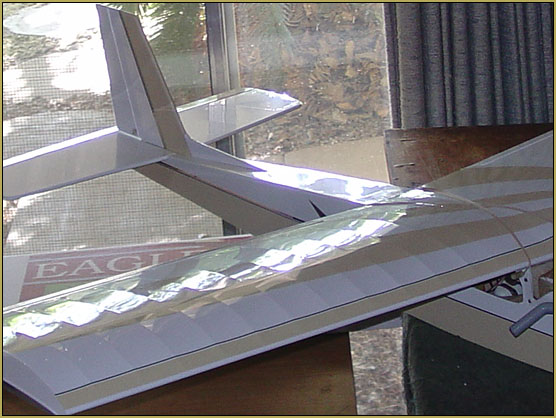
Like I said, I did leave a bridged-gap between an aileron and the body of the wing. After the trim piece seemed dry/stuck, I split that gap with an X-acto blade and then used my Coverite “Trim Sealing Iron” to clean-up that gap, folding the edges down tight and letting the hot iron adhere that film for a nice, tight finish of that aileron gap.
I then got a bit more brave and started to use that Trim Sealing Tool to stick-down a couple of the other loose edges that I saw… and… no problema! So I next went on to touching up a couple of slight wrinkles that had formed near the leading-edge of the wing… several rib-tops had needed to have their leading-edges shrink-shaped for a tight fit… and that Trim Tool DID shrink the film in discrete locations without causing a new wrinkle or a new bubble… I cannot say, enough, how pleased I was with each new experiment.
I didn’t try a heat gun…
The trim pieces look like “paint” on that wing… a great success! I wonder what will happen if I USE a heat-gun on it? … I mean, the trim pieces are not “shrinked”, at all … no heat was used to apply them. But… I DO see that the pieces are adhered very well… are now part of my model!
The final notes:
IT’S THE AMMONIA that does the job. The ammonia softens the Monokote adhesive. Other products containing ammonia may work… but Windex (glass cleaners) dry-up residue-free… and so are perfect for our use. MY WORKSHOP/Area is no “clean-room”… I DID get a few tiny crumbs trapped under my trim film… even a cat hair.. and, well, so be it! Better if you really DO have a clean-room for your covering project.
I saw on a forum-note that ULTRACOAT will not work this way… apparently Ultracoat’s adhesive uses a different formula. … and… PLEASE use this method at your own risk! It worked for me and my model in my workshop; I hope it works for you!… experiment on a bit of scrap before you dig-in on the real project!
UPDATE Sept 19, 2019
The “Windex Method” for MonoKote-over-MonoKote… it worked!
I decorated the Fin/Rudder with Monokote-over-Monokote using the “Windex method”. My first few attempts were failures… but, maybe, my Windex was… old?… didn’t want to work. I bought a new spray-bottle of Comet Glass Cleaner “with Ammonia”… but that spray had no effect on the Monokote. I poured some “household ammonia with fresh lemon scent” into that Comet glass cleaner… and saw no improvement in performance with the MonoKote.
I went to the local Flying-J truck-stop and bought THEIR brand of glass cleaner: MAX-PRO “Glass Shine” with ammonia…
SUCCESS!
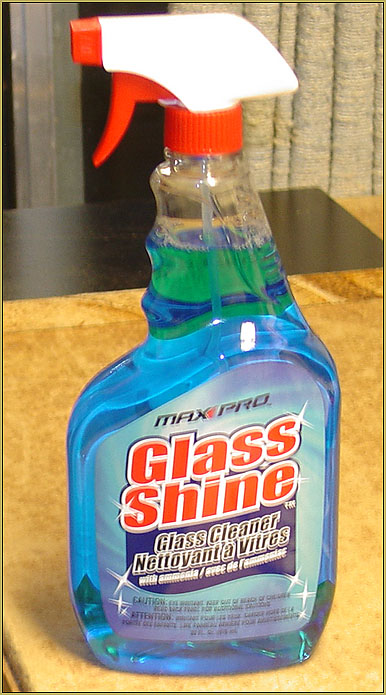
That MAX-PRO “Glass Shine” REALLY worked well with my MonoKote! I had done some searching through forums, online, and saw Windex guys leaving their application to dry for 5-hours… or two-weeks! MINE was tacky within about 15-minutes… maybe less… and in only a fat hour I was confident to trim-seal the edges and hot-iron the folds and round the corners. One of the secrets is to DRENCH the piece of MonoKote… and moisten the surface to be covered… and be in no hurry… give the glass cleaner plenty of time to soak-in and soften the MonoKote adhesive. Then I used the edge of a plastic credit card as a squeegee and worked all of the bubbles and wrinkles out of the piece. It does not go on like it has adhesive; you cannot follow a hinge-line or fold-over a corner… but just smooth it out on the flat surfaces and wait for it to harden-up so that you CAN do those things with your iron. A couple of times I saw a bit of dust trapped under the film as I squeegeed it… and, this method is so slow, that I was able to peel-up the film, remove the dust speck, and reapply the film. I MAY HAVE BEEN to anxious to “move on” with the project because, maybe I did not it let it set-up for long enough… a couple of times, I saw that some colored adhesive did squeeze-out from under the film as I sealed the edges with a hot iron. But… yesterday’s work still looks great, today… I think it worked!
I hope it works for you as it has for me!
