
| Editor’s Note: This article is like an EXPOSÉ of the model aircraft hobby! Sure, we get to spend a few minutes out at “the field” each week… but the REAL HOBBY happens in your home, in your workshop, on your worktable! |
I was not “in the market” for a new plane when one of my flyin’ buddies, Shawn, approached me with a new-in-the-box ARF… a Seagull Models 40-sized “Decathlon”… a beautiful model! And, though not “giving” it to me, he was asking a very low, give-away price… and he really wanted me to have it! “I want you to have it… I want you to fly it… It’s your kind of model; I know you won’t crash it!” … … “Well… I DO have a OS 46AX looking for a home… it IS a pretty airplane… … OK, I’ll do it.”
OK, I’ll do it.
That started me on an odyssey that is continuing, to this day!
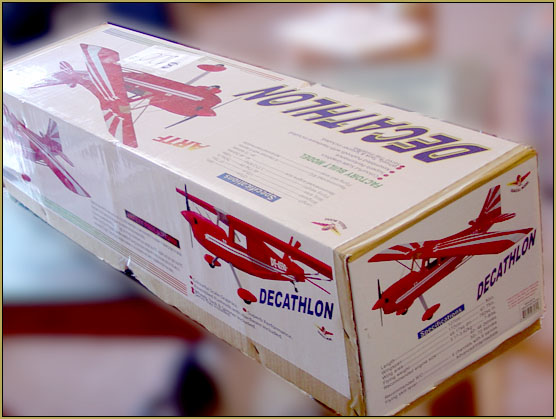
When I saw the almost 8-pound weight of the model, I figured it must need a 60-sized motor… but, there, on the box, the specs called for a 40 or 45-sized motor. Hmm, cool!
That model went together easily… it was an ARF but it was built “right” with a fit and finish that was most pleasing.
I did decide to buy a new spinner to replace the one in the ARF. THAT one was a couple of shades of deeper red than the model… and it had a Cessna “pointed” profile that would eat-up my starter-motor’s cone… so I bought a Du-Bro 2-1/4″ red spinner on eBay… fit perfect.
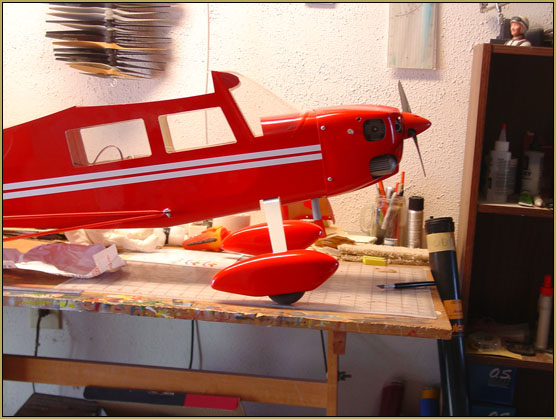

Ready to fly…
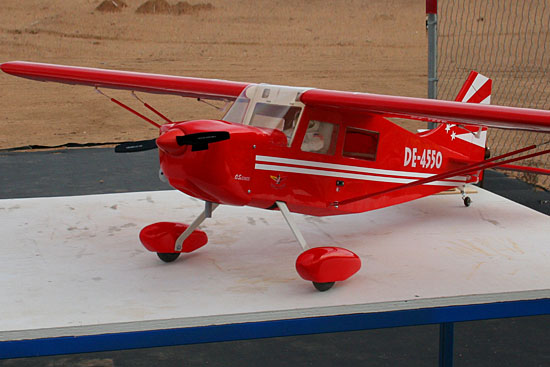
Almost lost it!
First flight… I took-off on low-rates… low rates and high-rates were specified in the instruction booklet… the model torqued to the left more than I expected but I got her off the ground, skimming just over the weeds and headed left for the cross-field fence! I had barely enough power and barley enough up-elevator to skip over the fence without incident. The rest of the flight went pretty well… I went to high-rates and all felt “normal”… trimmed-in some up-elevator to get a level, hands-free flight. I flew through some basic air-show maneuvers… fun!… but loops were not very large and the model was ready to fall-off of the top of the loop. The landing was smooth and the model went squirreley as it slowed-down on the runway… not unexpected of a tail-dragger in the hands of a pilot unaccustomed to their quirks!
Second flight… a better take-off… a little up-elevator to keep the tail down and more right-rudder! Again… OK flight, OK landing… squirreley bit of landing run-out… and into the short weeds off the far side of the “pavement”. … Actually damaged the model’s landing-gear mounts and structure while crunching through those weeds… had to call it quits for the day. … The over-all opinion of those at the field was “under powered”… Shawn said “Don’t bring it back out here without a 60 on it!”
Fix the landing gear mounts…
The landing gear support structure inside the Seagull Decathlon is actually very lightly built! By driving my model through the weeds (for only a few feet) I had shattered the 1/4″ thick main mounting block into which the landing gear struts are secured. Also cracked and split-apart were the 1/8″ lite-ply fuselage formers in that area. I was not able to disassemble the fuselage… so I decided to drench that area in epoxy and go with a follow-up splash of medium CA… I added more wood to encase the whole area. … seems strong, for now… we’ll see what happens NEXT time!
A bigger engine!
I didn’t want to spend a bunch of money on this project… so I went onto eBay with a bottom-feeder mentality: how much could I buy for how little? After a couple of days of searching, an OS 65LA came onto the market, there. The seller called it UIB, Used in-box. … It looked new with instruction booklet, decal sheet and a nice, clean box. The glow plug looked used and there were mounting bolt scuffs on the mounts, but, otherwise, it looked clean and new. When I got there, there were already five bids on it, but, still, a low price… like $53 with two days to go on the auction. The next day there was another bid… bringing it up to $54. THESE bidders were the true bottom-feeders… only going up by a buck or two with each bid! I decided I wanted that motor for this project and so I bid $121.87 as my max bid … you know how eBay works, I was now the winning bidder at $1 over the previous high bid: now $ 57. … I just held-tight and waited to see what other bids might come in. BINGO! My bid had been enough. There was a flurry of last-second “sniper” bids at the last possible moment, but, again: bottom-feeders! I “won” the bidding at $77 plus shipping: another $10.50… so: $88.50, delivered… Nice price for an OS 65LA!
I got the engine in the mail and put it right onto a motor test-stand. I do not know the history of this motor, so I decided to treat it like “new” with a break-in period. I mounted the Decathlon’s fuel tank onto the motor stand… checked the 65’s glow plug… all looking ready to go! I mounted a 12-6 APC prop… a 12-6 for the break-in period per the OS instruction manual. The motor started first-flip! I ran six tanks of fuel through it… starting rich and then a little more lean until, for the last tank, it was ready to fly! At the end, my tach showed just about 11,000 RPM… 10.85, 11.1. That first tank of fuel, running the motor rich, didn’t last eight minutes. That LAST tank of fuel, with the motor at the “ready to fly” needle-valve setting, lasted nearly 16-minutes!
Slice and Dice!
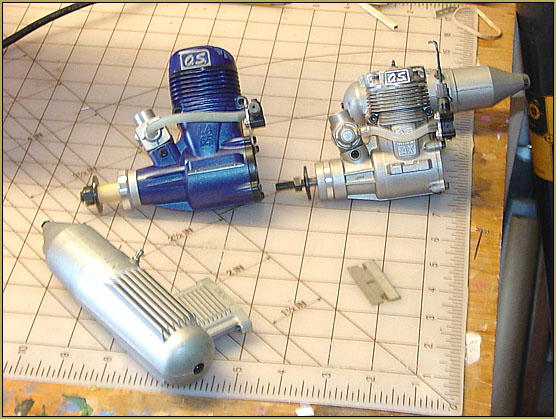
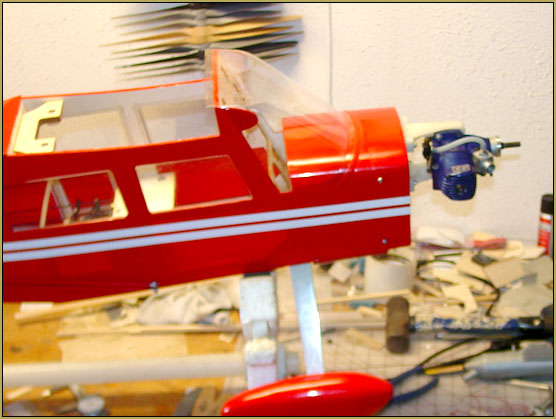
Wow! … that new motor is larger than the old one! The specs showed the crankcase to be a full 10mm wider than the OS 46AX I was replacing: I had to move or maybe replace the kit’s nylon motor mounts and I had to think about drilling more holes in the firewall… more T-nuts… and getting the alignment “just right”.
I went back onto eBay and ordered new Sig 61-90-sized motor mounts. While waiting for them to get here, I schemed that I might just keep the top motor-mount in-place and move only the BOTTOM mount so as to accommodate the larger crankcase… but that would move the engine’s center-line/thrust-line down 5mm… half of that increased width … and I decided that 5mm (half a centimeter) was not a big deal in a wood and plastic flying model. … and, upon further investigation, I found that the original mounts had elongated mounting holes that would allow me to move the existing mount “up” by about 2mm… THAT reduces that 5mm out-of-alignment to only 3mm… no one would notice the difference!
The Sig motor mounts arrived. and, were identical in size to my existing mounts, except the mounting holes were in different locations. I decided to “go!” with my plan of keeping the original mounts, scooting the top mounts “up” in their slots to gain the couple of millimeters available, there, and then re-positioning the lower mounts, drilling new holes in the firewall to accommodate the new motor’s width.
Obsession – Perseverance!
I decided to re-use the motor-mount T-nuts that were already in the firewall; my new drill-position for the moved motor-mount was only a few millimeters away from the old T-nuts. I screwed a bolt into each of those T-nuts and tapped them back out of the firewall with a big hammer… NO PROBLEMA… except that, mounted/glued to the BACK-side of the firewall was… I say “was”… a bracket assembly made of light-ply that supports the end of the fuel tank. THAT came apart as the T-nuts were removed.
I went ahead and marked and drilled the new motor-mount holes in the firewall… making those holes large enough that the T-Nut would wedge into them for a tight fit.
Hmmmm… how to reach those T-nuts way down in there to the back of the firewall where my fingertips could not reach? … and how to get them started so I could put a bolt into them from the other side?
I decided to use a piece of cord tied to a chunk of wood… I threaded the cord through the T-nut and tied the cord around that chunk of wood. I ran the cord from the cockpit of the model through the hole I had drilled in the firewall and then tugged on that cord to draw the T-nut into the drilled hole. Of course, the hole proved to be too tight a fit and it gave ME fits as I tried to force that nut into the tight hole… and the nut popping-off inside after I had withdrawn the cord and tried to fit the bolt into it. I eventually reamed-out the hole for a better fit and so was successful in getting those T-nuts into place.
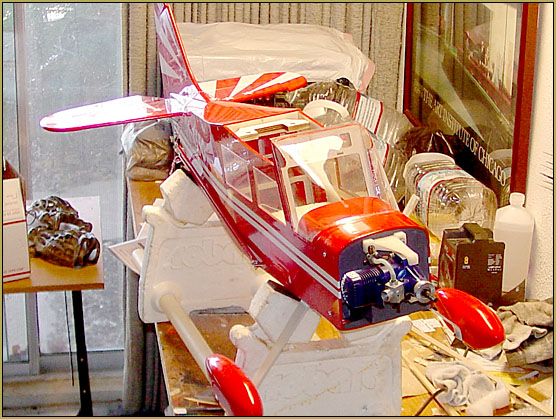
I finished installing the motor mounts, test fit the motor, drilled the remaining holes to mount the motor to the bearer… and… the new motor install was about finished!
MORE Slice and Dice
I had to figure out how to rebuild that tank-support way down inside there against the firewall where my hand could not reach… That little construct was an important part of the model’s system. Luckily, one wing of the little plywood box that I had busted-up was still attached to the firewall. While holding them in my hand, I glued together with CA those loose bits that I had knocked loose by tapping-out those T-nuts.
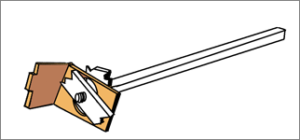 I created a rig that was simply a 10-inch long wand made of quarter-inch square balsa stick with a 3/4″ long fine wood-screw glued lengthwise to the end of it. I put a square of 1/16″ scrap wood threaded onto the screw and stripped the threads of it so it could wobble freely on the screw… I placed the CA-assembled bracket loosely onto the screw and I then used a flat, narrow piece of 1/8″ balsa scrap, threaded onto the end of the screw, to clamp the bracket to my wand assembly. … I mixed-up 30-min epoxy and reached into the back of the firewall with a long scrap of balsa to dab the assembly-area with fresh epoxy and also to re-secure that remaining bit of the bracket to the firewall. … I dabbed epoxy all over the bracket on my wand, being sure not to get any epoxy on the wand assembly. … My plan was to hit everything with epoxy, hold that bracket assembly in place with the wand as the epoxy set-up… and then twist the wand to unscrew it from the bits of balsa which could fall away loosely, leaving the tank-mount bracket installed upon the firewall… … Success!
Still MORE Slice and Dice!
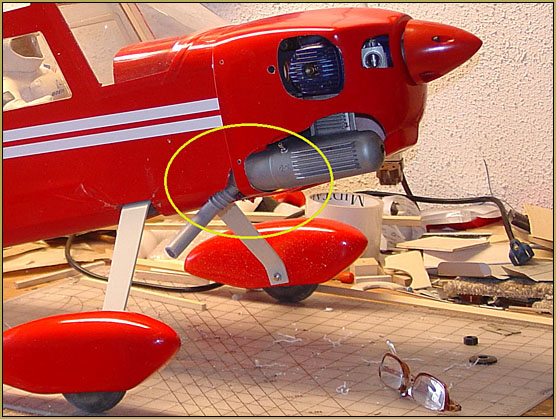
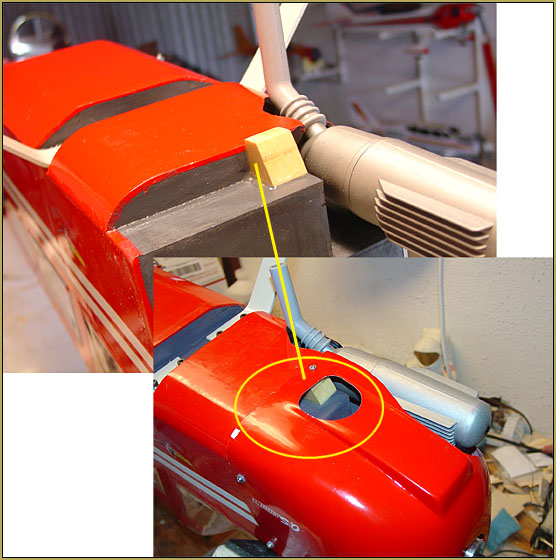
NOW I had to work-in the larger muffler! I considered finding a Pitts Muffler or an in-cowl muffler to allow for an easy install of the tailpipe. But after searching Tower Hobbies and eBay, I could not find one that’d be “just right” for less than, like FIFTY bucks… I did not want to go there…. so I decided to whip out the moto-tool with a cutter bit and start cutting-away balsa and glass!
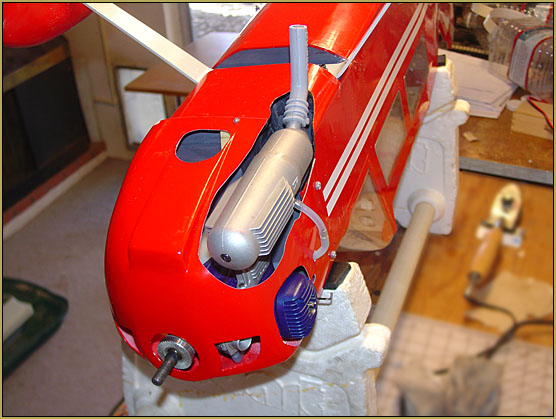
Needed a new spinner…
That larger motor has a propeller back-plate that is too large to fit into the plastic recess on the back of the 2-1/4″ spinner I had purchased, earlier. … also, I wanted to use a prop-size large than would fit into the cut-outs of that little spinner. The next step-up is the 2-1/2″ size… which works well considering that I had moved the center-line of the motor down a few millimeters and so that 1/8″ increase of radius on the spinner would be about perfect. … I bought the 2-1/2″ spinner on eBay, got it… fits perfect!
Getting close!
A “lesser man” would have given-up, by now, right??
I set-up my Great Planes Balance Machine to see how I was doing. That big motor out-weighed that “little” 46 by a bunch!
… And, sure enough, it turned-out that I would have to put the flight-battery as far to the rear of the aircraft as possible in order to avoid adding extra dead-weight to the model.
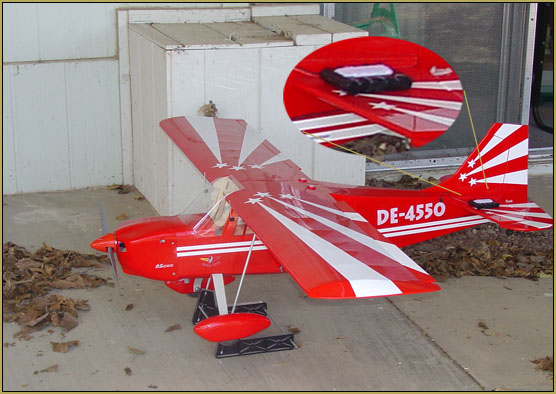
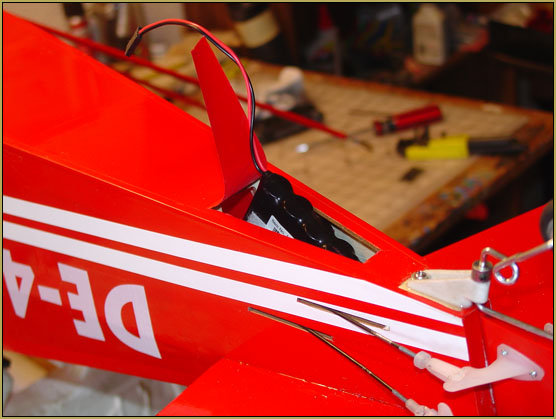
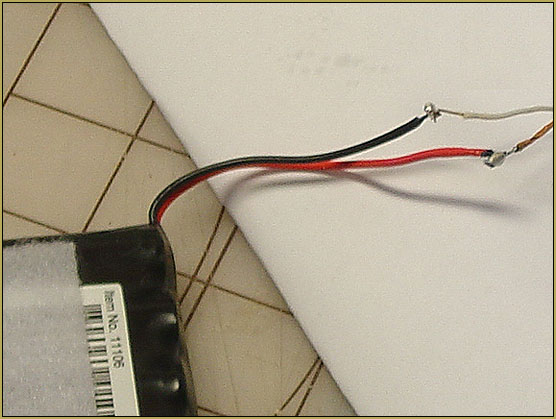
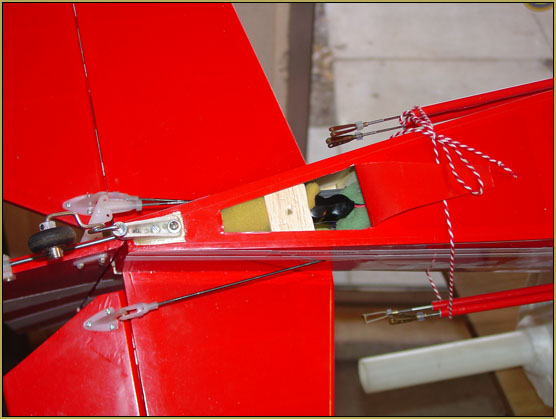
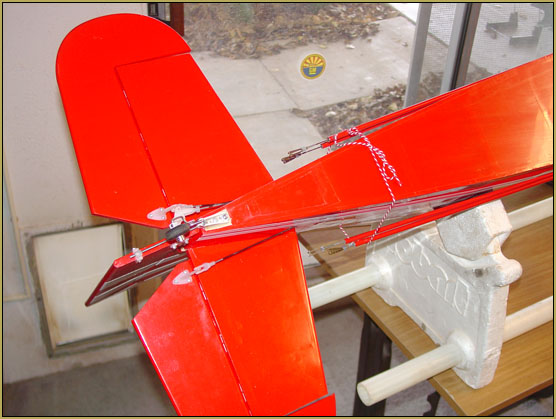
Doesn’t this guy EVER give up??
Back to the balance machine! … Perfecto! … The book calls for a CG of 8 to 9 centimeters from the leading edge (that’d be right at the back edge of the main spar). … My balance machine shows a slight nose-heavy at 9 cm and right-on, maybe a little tail-heavy at 8 cm. I like it.
I weighed the completed model: 7-pounds, 8-ounces. … The box says should be 7 to 8 pounds… right on! (With the 46ax on it, the weight had been 6-pounds 15oz.)
I checked my propeller inventory… The OS LA65 booklet says to do a run-in with a 12-6… and fly with a 12-8, a 13-6, -7 or a 13-8
I have a 13-7 APC that fits right ON there! … I have a 12-8 wooden Zinger, as well… we will see what works the best!
Not done yet… I found an image of an actual Decathlon control panel/dashboard. I cleaned it up in Photoshop for my use… I may get around to printing and installing it into my model… another day!
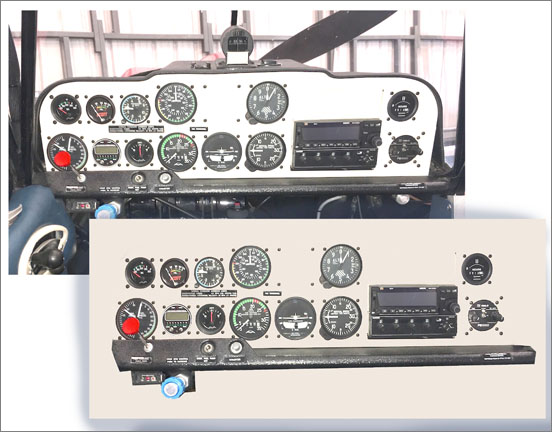
This model is FINISHED… for the time-being! It’s just hanging on the wall, now… waiting for a “nice day” for it’s new Maiden Flight!
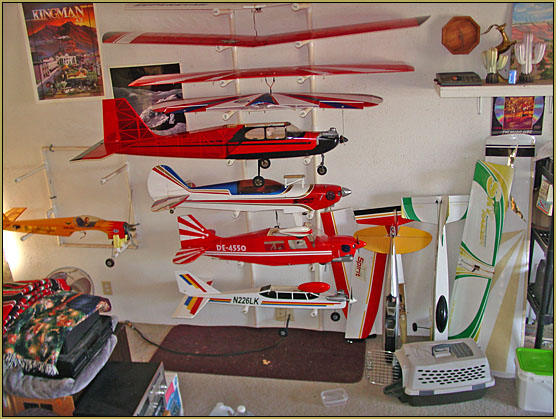
UPDATE 3/14/19:
The model now “flies nice”. I flew a 13×7 APC prop and got great vertical performance, but the engine was all-in: RPM was at max before throttle was wide-open. NEXT flight I had a 13-6 “Zinger” wood prop on it… better throttle response but not so much vertical… still… I think I will stick with the 13-6. Tach shows RPM on the bench of about 10,300 RPM… OK, I guess. The model needs to fly fast… I was at over half-throttle for the entire flight and it needs a hotter-than-you-think landing approach speed. It’s OK to stall-in for a three-point landing, but only cut below 1/3 throttle for the last few feet of altitude… gotta fly it to the runway surfac e; keep moving fast on approach or it will stall before you know it!
It has a very realistic full-scale presence in the air… nice! It’s easy to fly it in a scale manner. It is no 3D-machine, but scale-like maneuvers are a dream. This model has a lot to teach me… looking forward to it.
UPDATE 3/24/19: CRAAASHED IT!
Crashed my Decathlon 40… popped off the ground into a full stall!
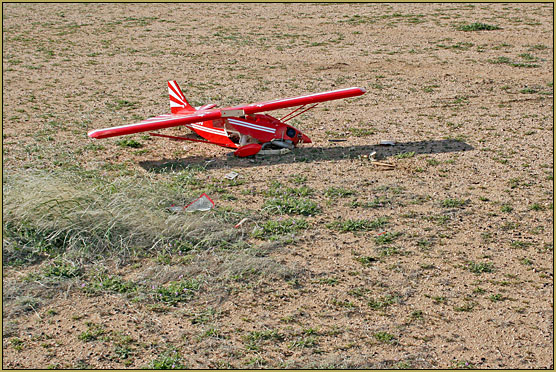
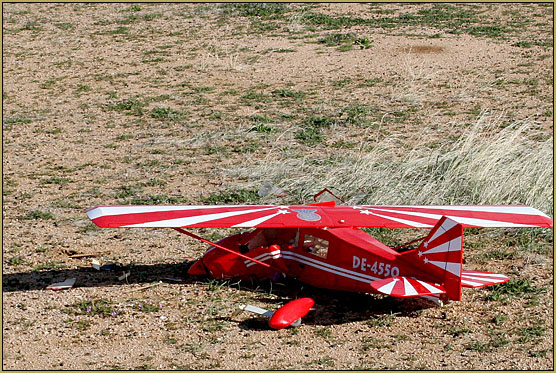
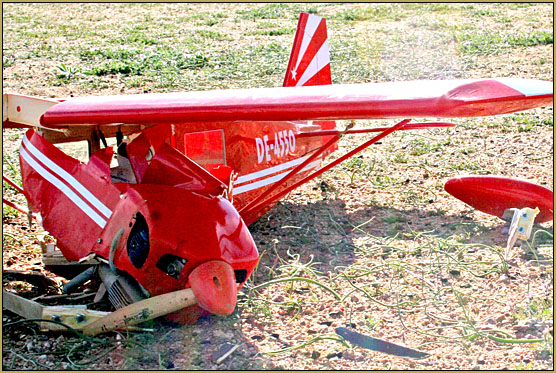
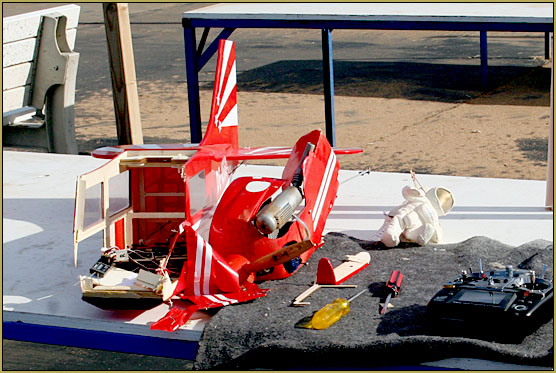
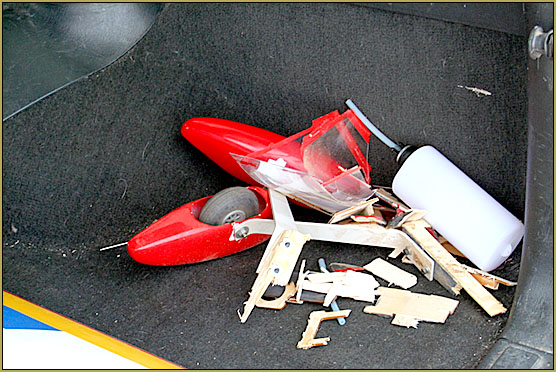

Destroyed! … I gave away the wing… it was in perfect shape! … I picked the hardware out of the carcass like picking goodies from roast chicken leftovers…

Great story my friend… Hope she flys we’ll see you soon…
Great article Eric, I loved reading it good job on the airplane.
Thank you, man… fun stuff!
Interesting read. Traumas of the obsessed or maybe addicted! Good clean work, maybe you want to work on my planes as honorary mechanical engineer? Looking forward to seeing the increased performance from the Decathalon.
Nice build! Hope you have many great flights.
Thank you!
Nice article and a very nice plane can’t wait to see you fly it here real soon, I’m back in the game again.
My email is Realdeal1@q.com
I crashed mine saturday and have been scouring the planet for a fuselage…..any chance you have one?
There are son many different ones but your plane is in fact the same as mine, I can see the way the wing attaches it is the same.
Tom H.
Thanks a lot.
Do I have one? … Mine was disintegrated in that crash. It is lightly built of lasercut balsa and plywood… I didn’t have enough pieces larger than 2-inches to consider piecing it together!… so … “nope!” … but I see you can buy them on the Sig website. But the cost of parts is greater than buying a new ARF! … The Arf is $216 (includes shipping, I think) … the Fuselage part is $111… and when you add canopy and tail-feathers, its 202, or so, plus shipping!